<?xml version="1.0" encoding="UTF-8"?>
<feed xmlns="http://www.w3.org/2005/Atom" xml:lang="en-gb">
<link rel="self" type="application/atom+xml" href="http://forum.robosavvy.com/feed.php?f=26&amp;t=9088" />

<title>RoboSavvy Forum</title>
<subtitle>Robosavvy Forum: The largest online community of Humanoid Robot Builders</subtitle>
<link href="http://forum.robosavvy.com/index.php" />
<updated>2013-02-22T19:03:01+01:00</updated>

<author><name><![CDATA[RoboSavvy Forum]]></name></author>
<id>http://forum.robosavvy.com/feed.php?f=26&amp;t=9088</id>
<entry>
<author><name><![CDATA[MarcoP]]></name></author>
<updated>2013-02-22T19:03:01+01:00</updated>
<published>2013-02-22T19:03:01+01:00</published>
<id>http://forum.robosavvy.com/viewtopic.php?t=9088&amp;p=37217#p37217</id>
<link href="http://forum.robosavvy.com/viewtopic.php?t=9088&amp;p=37217#p37217"/>
<title type="html"><![CDATA[Sensor board for our humanoid]]></title>

<content type="html" xml:base="http://forum.robosavvy.com/viewtopic.php?t=9088&amp;p=37217#p37217"><![CDATA[
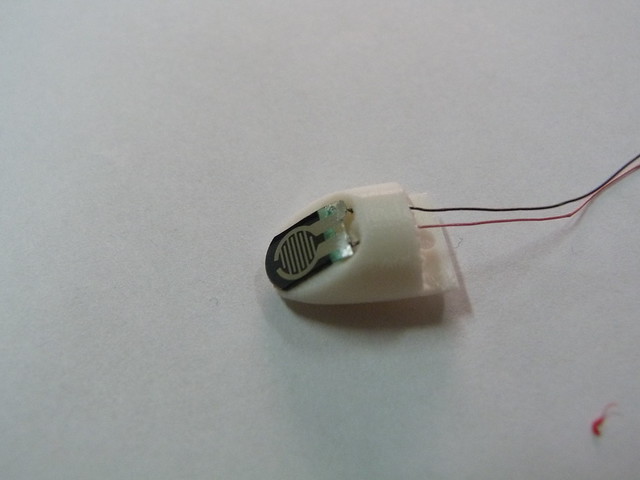
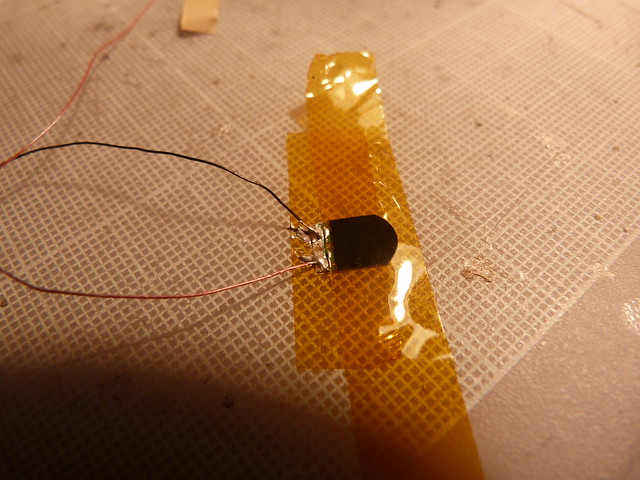
Here is a update on the sensors.<br /><br />We are using this <a href="http://robosavvy.com/store/index.php/cPath/41_1023_1143" class="postlink">FSR</a> to measure pressure in the finger tips.<br /><br />More info on that at <a href="http://robosavvy.com/forum/viewtopic.php?p=36994#36994" class="postlink">http://robosavvy.com/forum/viewtopic.php?p=36994#3699</a>4 <br /><br />The sensors have to be modified to make them smaller to fit inside the finger tip.  After understanding exactly how it works and and doing some tests we manage to cut it down to size, and glue some wires using conductive epoxy. <br /><br /><a href="http://www.flickr.com/photos/robosavvy/8497366749/" class="postlink"><img src="http://farm9.staticflickr.com/8096/8497366749_0aa9f25c1a_z.jpg" alt="Image" /></a><br /><br />Them they were glued on the tip of a finger.<br /><a href="http://www.flickr.com/photos/robosavvy/8497366909/" class="postlink"><img src="http://farm9.staticflickr.com/8106/8497366909_d1caf98383_z.jpg" alt="Image" /></a><br /><br /><br />Next step is to add some of silicone to the tip to protect the sensor and increase grip.<br /><br />Rgds<p>Statistics: Posted by <a href="http://forum.robosavvy.com/memberlist.php?mode=viewprofile&amp;u=3133">MarcoP</a> — Fri Feb 22, 2013 7:03 pm</p><hr />
]]></content>
</entry>
<entry>
<author><name><![CDATA[limor]]></name></author>
<updated>2013-02-17T22:43:16+01:00</updated>
<published>2013-02-17T22:43:16+01:00</published>
<id>http://forum.robosavvy.com/viewtopic.php?t=9088&amp;p=37186#p37186</id>
<link href="http://forum.robosavvy.com/viewtopic.php?t=9088&amp;p=37186#p37186"/>
<title type="html"><![CDATA[Sensor board for our humanoid]]></title>

<content type="html" xml:base="http://forum.robosavvy.com/viewtopic.php?t=9088&amp;p=37186#p37186"><![CDATA[
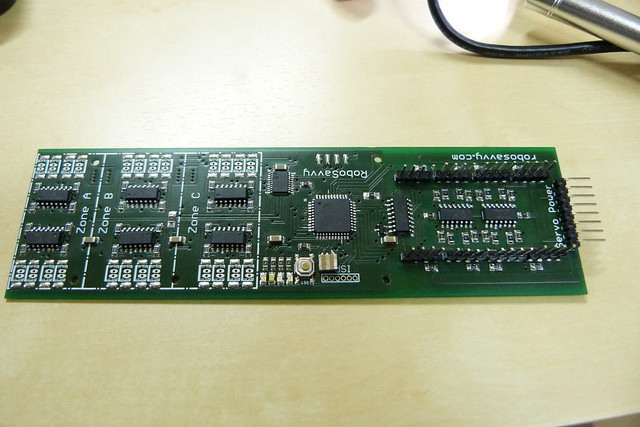
small step for mankind, big step for RoboSavvy!<br />and you forgot to mention some of the features of this board:<br />- 24 analog inputs at 200ksps<br />- 8 RC servos - with current measurement<br />- Arduino firmware<br />- PC based closed loop protocol over USB/serial at over 200hz<br />- ROS support on Linux/USB/Serial<br /><br />So basically this board allows for a robot to be controlled by a PC. The PC receives all the sensor data 200 times per second and sends back target position to the RC servos. <br />We hacked some RC servos and fed the POT value to the board.<br />ie: the board (and hence the PC) can sense the current draw and the position of 8 servos 200 times/sec in addition to values from Force Sense Resistors, allowing any type of elaborate control and sensing of the environment.<br />We use this board to create a very clever robot hand but after the project is done we will demonstrate how it can be used with a small humanoid robot that can walk on uneven terrain.<p>Statistics: Posted by <a href="http://forum.robosavvy.com/memberlist.php?mode=viewprofile&amp;u=2">limor</a> — Sun Feb 17, 2013 10:43 pm</p><hr />
]]></content>
</entry>
<entry>
<author><name><![CDATA[TiagoM]]></name></author>
<updated>2013-02-15T12:39:50+01:00</updated>
<published>2013-02-15T12:39:50+01:00</published>
<id>http://forum.robosavvy.com/viewtopic.php?t=9088&amp;p=37178#p37178</id>
<link href="http://forum.robosavvy.com/viewtopic.php?t=9088&amp;p=37178#p37178"/>
<title type="html"><![CDATA[Sensor board for our humanoid]]></title>

<content type="html" xml:base="http://forum.robosavvy.com/viewtopic.php?t=9088&amp;p=37178#p37178"><![CDATA[
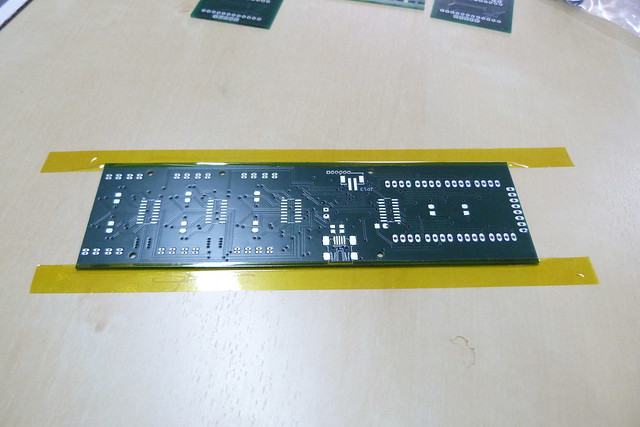
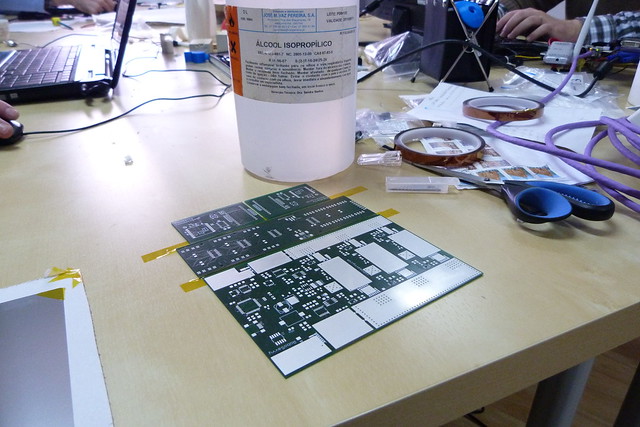
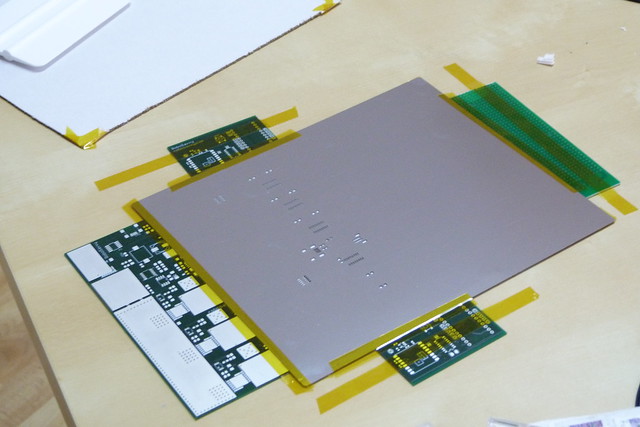
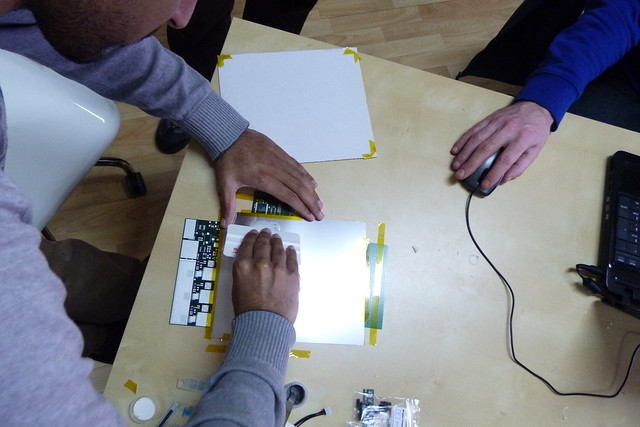
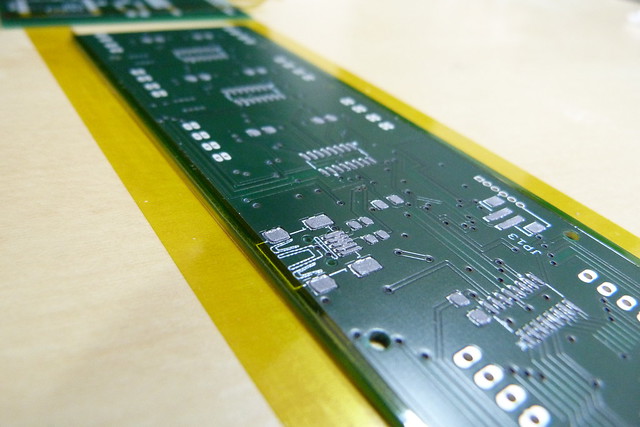
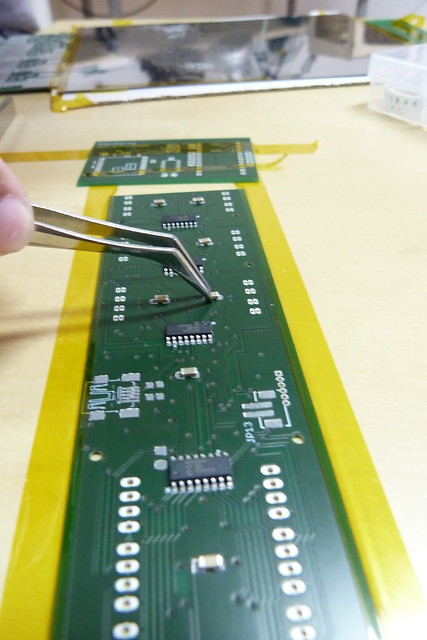
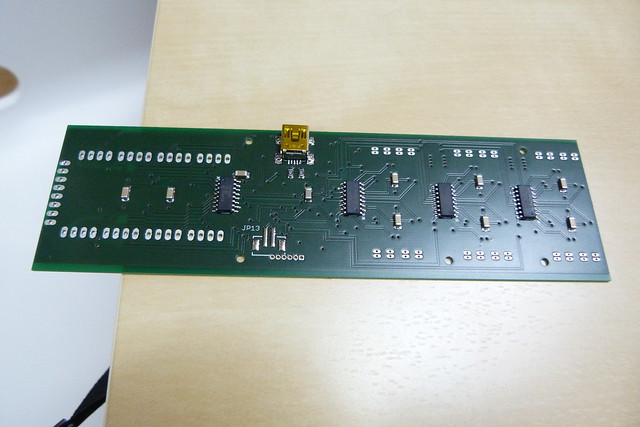
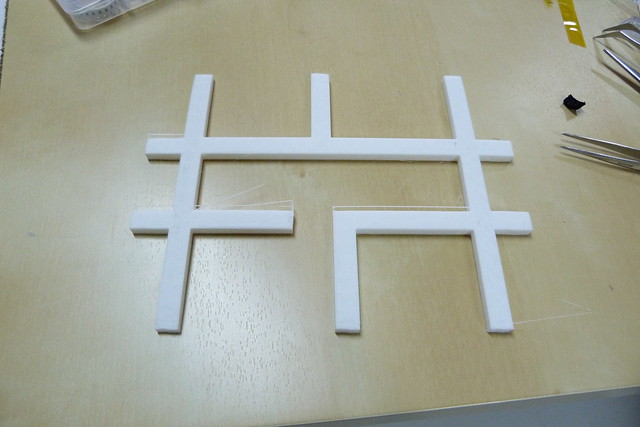
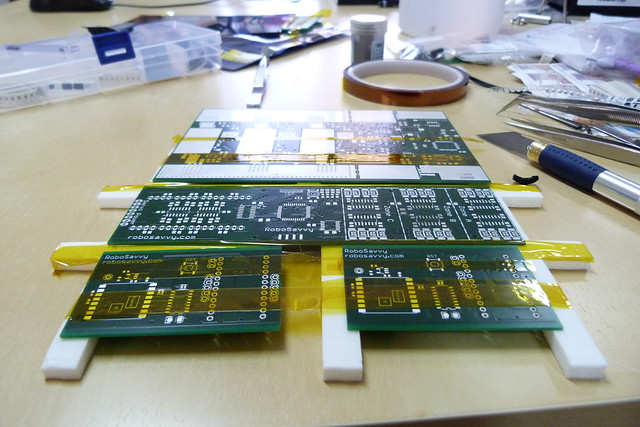
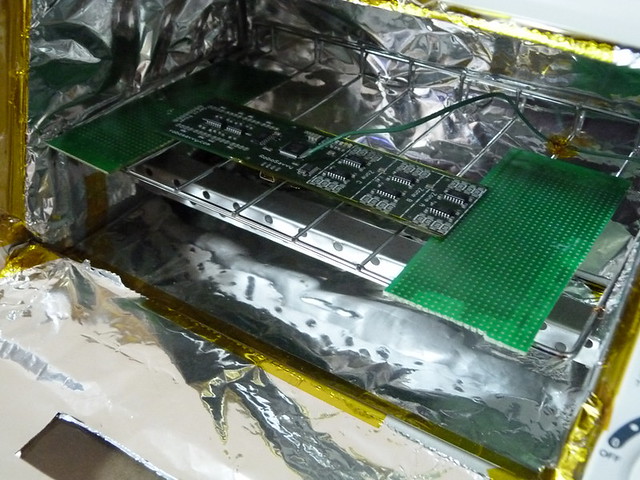
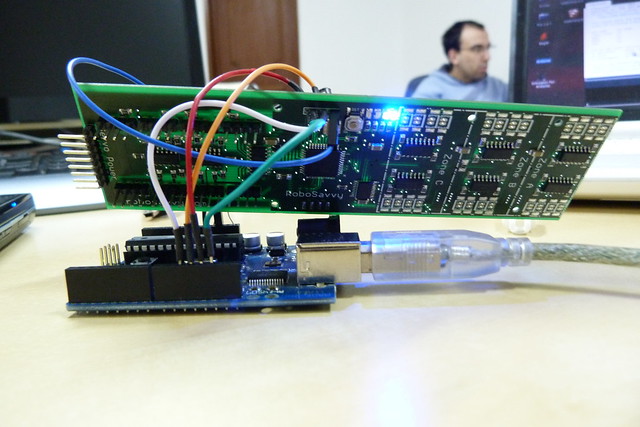
Howdy!<br /><br />Here is the build process of the sensor board for the hand of our 1m humanoid robot.<br />It's a 24 FSR 8 Servo board based on the Arduino Leonardo (the Atmega32u4 chip).<br />The board has 5 8-input 10bit ADCs capable of doing 200ksps to read the 24 sensors, servo position and servo current.<br /><br />Anyway, without delay here are the pictures:<br /><br /><a href="http://www.flickr.com/photos/robosavvy/8473635943/" class="postlink"><img src="http://farm9.staticflickr.com/8244/8473635943_5ce8f99002_z.jpg" alt="Image" /></a><br />Securing the board with Kapton tape<br /><br /><a href="http://www.flickr.com/photos/robosavvy/8473637217/" class="postlink"><img src="http://farm9.staticflickr.com/8369/8473637217_758a571495_z.jpg" alt="Image" /></a><br />Leveling with other boards of the same hight<br /><br /><a href="http://www.flickr.com/photos/robosavvy/8474729988/" class="postlink"><img src="http://farm9.staticflickr.com/8386/8474729988_e4d6416831_z.jpg" alt="Image" /></a>- Securing the stencil on top<br /><br /><a href="http://www.flickr.com/photos/robosavvy/8473638241/" class="postlink"><img src="http://farm9.staticflickr.com/8106/8473638241_b4e61fce2d_z.jpg" alt="Image" /></a><br />Applying the paste with the Makerbot's squeegee<br /><br /><br /><a href="http://www.flickr.com/photos/robosavvy/8474727064/" class="postlink"><img src="http://farm9.staticflickr.com/8368/8474727064_def19a4e51_z.jpg" alt="Image" /></a><br />Solder paste applied<br /><br /><a href="http://www.flickr.com/photos/robosavvy/8473640475/" class="postlink"><img src="http://farm9.staticflickr.com/8098/8473640475_b21712c1cc_z.jpg" alt="Image" /></a><br />Placing all the components, one by one<br /><br /><a href="http://www.flickr.com/photos/robosavvy/8473643739/" class="postlink"><img src="http://farm9.staticflickr.com/8386/8473643739_676ae8ccd9_z.jpg" alt="Image" /></a><br />Bottom part done<br /><br /><a href="http://www.flickr.com/photos/robosavvy/8473641435/" class="postlink"><img src="http://farm9.staticflickr.com/8392/8473641435_c151ce0f86_z.jpg" alt="Image" /></a><br />Raiser tool printed on the Replicator 2. Because it's a dual-sided board we had to raise it in order to level it.<br /><br /><a href="http://www.flickr.com/photos/robosavvy/8474732480/" class="postlink"><img src="http://farm9.staticflickr.com/8516/8474732480_fc11552157_z.jpg" alt="Image" /></a><br />Again, leveling with other boards<br /><br /><a href="http://www.flickr.com/photos/robosavvy/8473645265/" class="postlink"><img src="http://farm9.staticflickr.com/8236/8473645265_2c89503b6f_z.jpg" alt="Image" /></a><br />Board in the oven<br /><br /><a href="http://www.flickr.com/photos/robosavvy/8474734112/" class="postlink"><img src="http://farm9.staticflickr.com/8098/8474734112_11a713b6e1_z.jpg" alt="Image" /></a><br />Programming the board, Macgyver style<br /><br /><a href="http://www.flickr.com/photos/robosavvy/8473647499/" class="postlink"><img src="http://farm9.staticflickr.com/8231/8473647499_9568961f77_z.jpg" alt="Image" /></a><br />Ta-da! Board done.<br /><br />And that's all folks.<br />I'm now programming and testing it but so far so good!<br />Cya<p>Statistics: Posted by <a href="http://forum.robosavvy.com/memberlist.php?mode=viewprofile&amp;u=4129">TiagoM</a> — Fri Feb 15, 2013 12:39 pm</p><hr />
]]></content>
</entry>
</feed>