IGEP Module: setting it up with Windows 7
IGEP Module: setting it up with Windows 7
![]() by limor
by limor
Mon Nov 15, 2010 4:59 pm
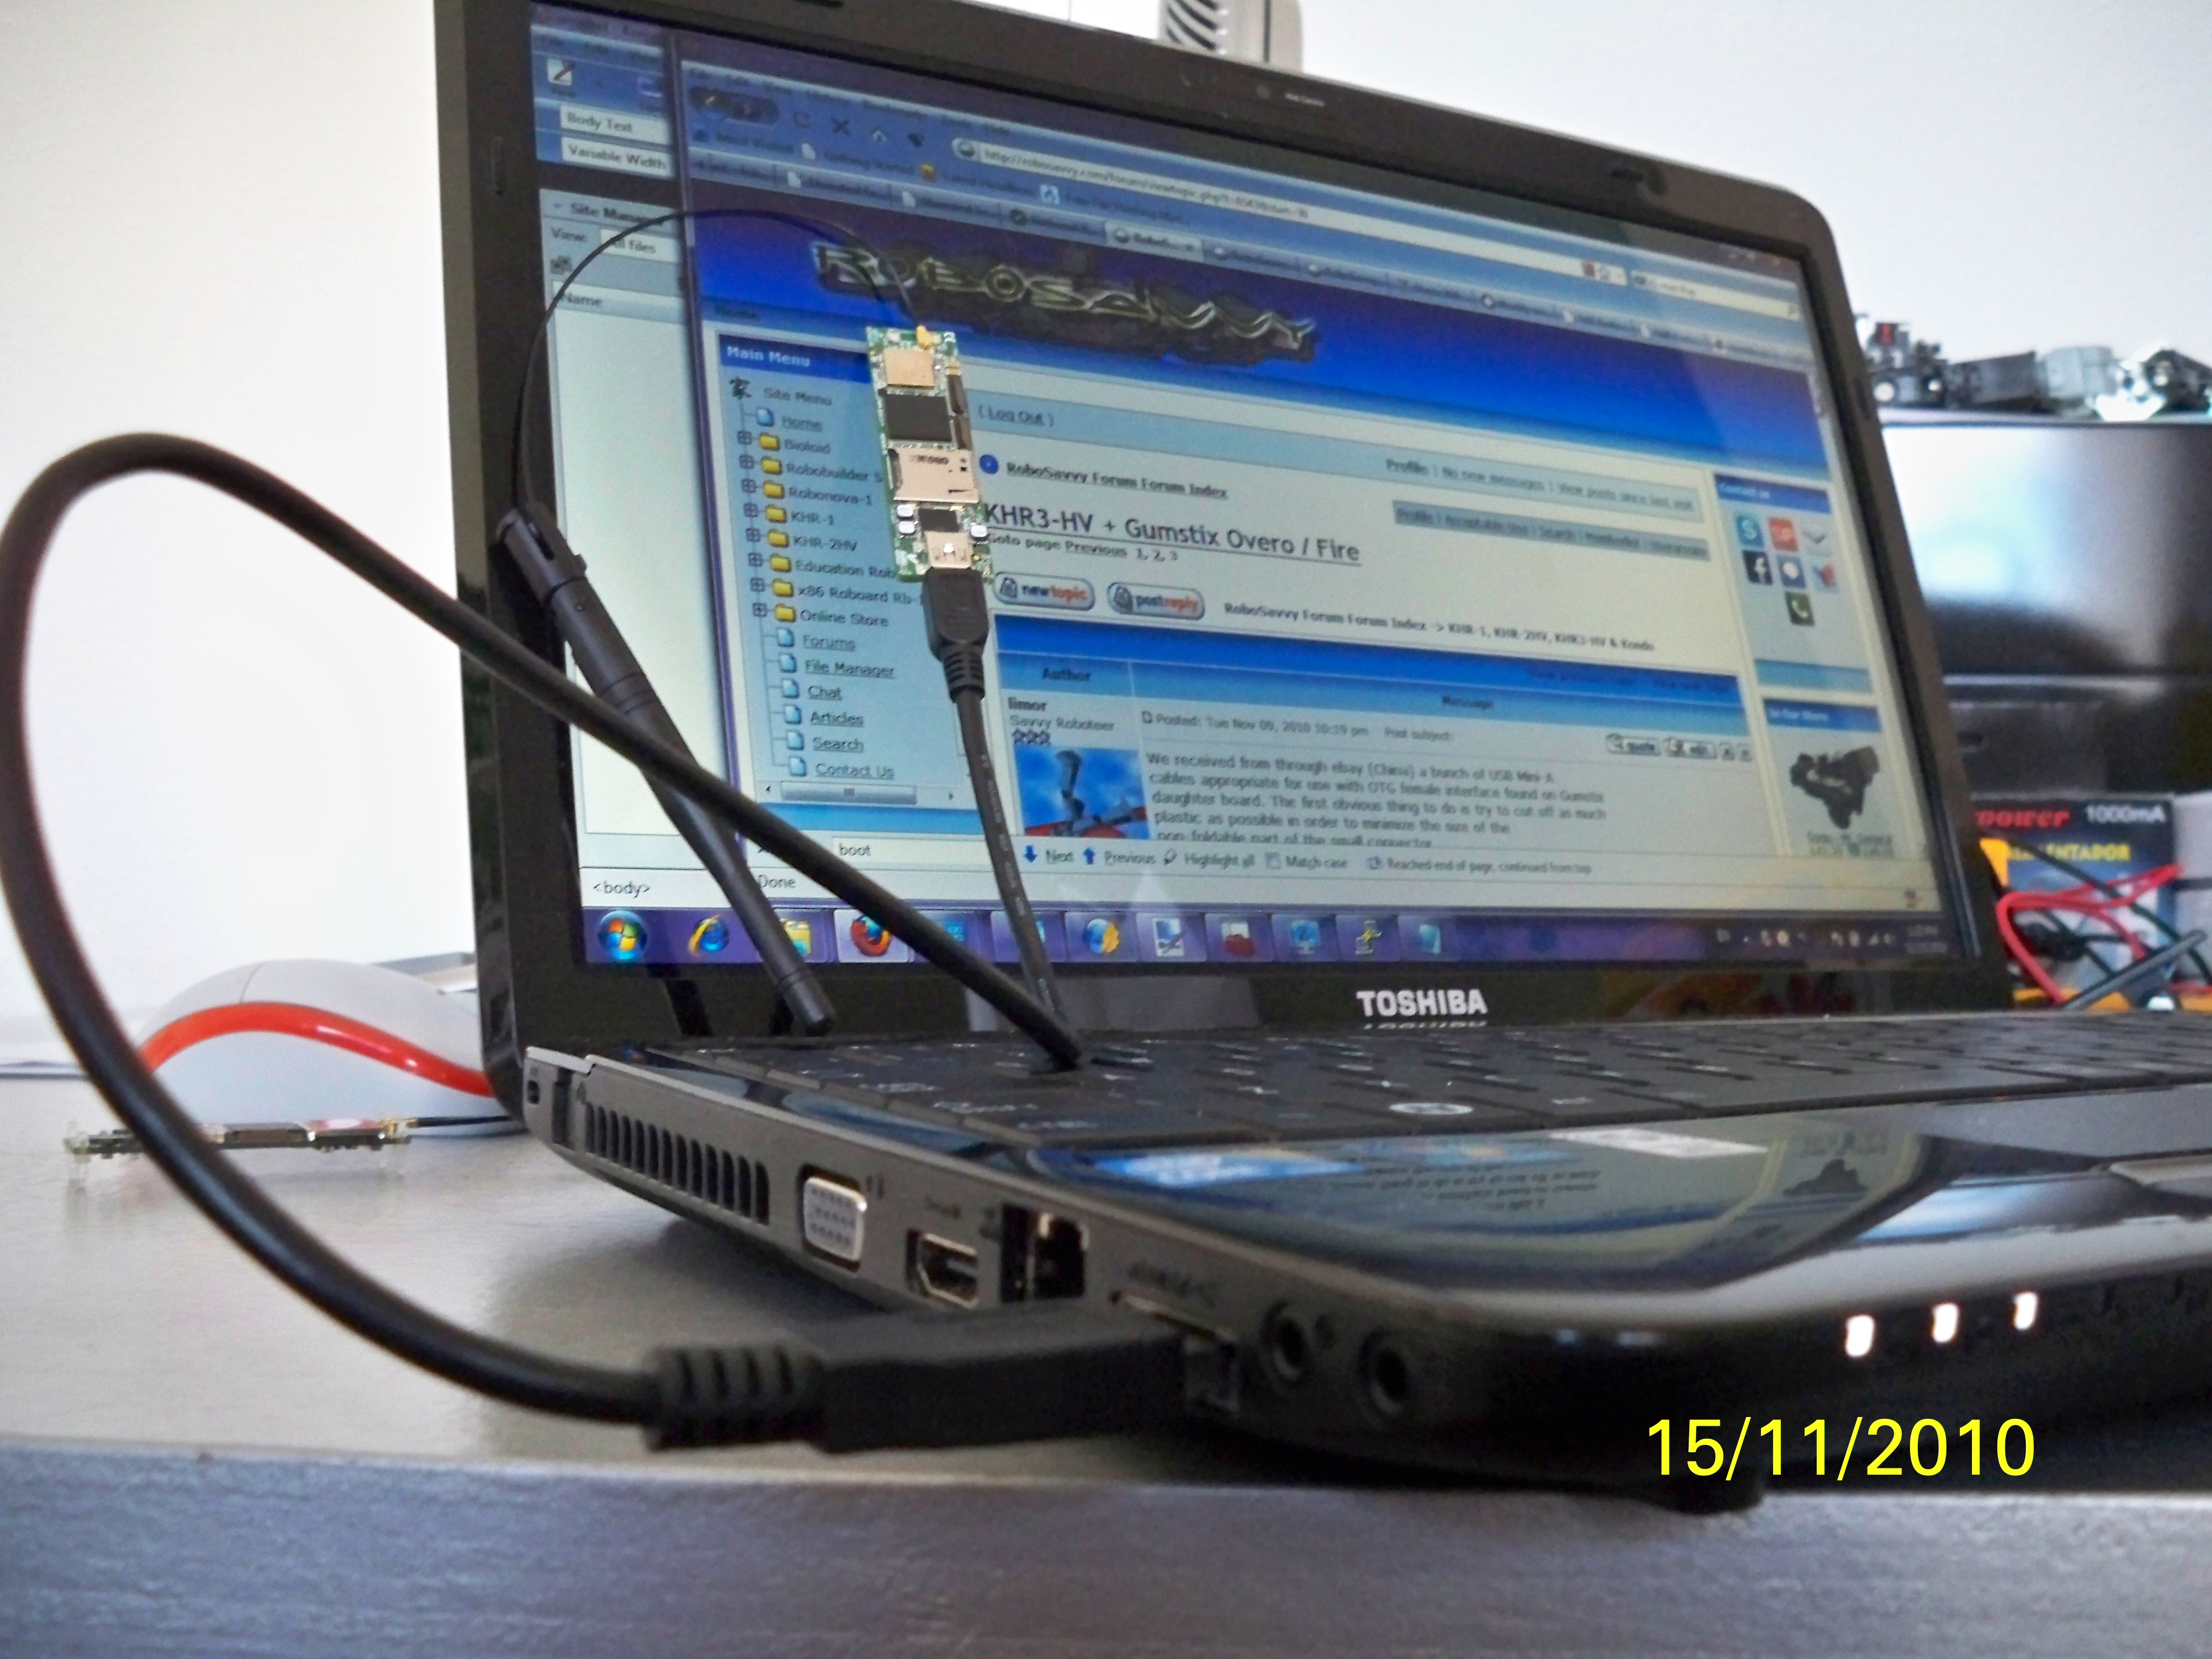
Here is how we got the IGEP module to hook up to Windows7 and allow us to log into it and configure it's wifi to connect to our local WPA wifi network when booting up.
When you first connect the IGEP module to the Win7 USB, it is identified as OMAP 3430 plus another unknown device. We guess that the module's bootloader is responsible for these IDs maybe expecting firmware flashing response over USB.. However, if you wait 20 seconds, after the module boots its Linux, it then initiates the RNDIS USB driver which then sends a new identification packets over USB. Scroll down here to see the USB ID message that shows up after it has completed booting.
(btw: you need a USB cable type mini-B which was not shipped with the module but it is the most common standard USB cable available everywhere)

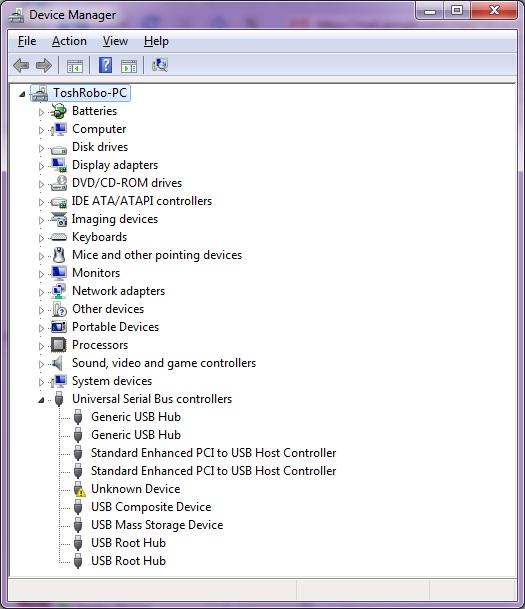
In the Windows Device Manager you can see the unknown USB device.
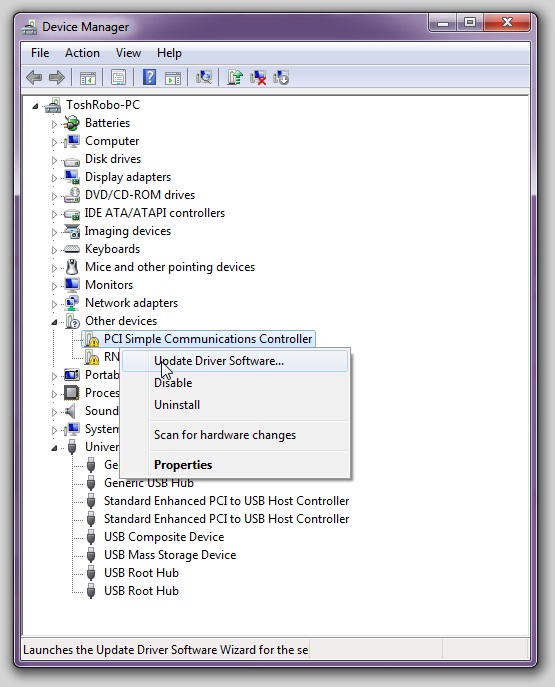
Right-click and Select "Update Driver Software.."

Manually select driver..

"Let me pick from a list.." - The RNDIS standard driver is developed by Microsoft and already installed in Windows

Uncheck "Show compatible drivers" because obviously Windows hasn't managed to figure out what the right driver was based on the advertised ID from the device.

Bad news. We don't get the option of RNDIS driver so something must be wrong. hm..

We reboot the module (detach and reattach the module from USB) and this time wait about 15-20 seconds for the boot to complete. And guess what? this time we get a second USB popup window.
"RNDIS/Ethernet Gadget". So now we go through the above sequence again and this time hopefully associate the driver with the device.

Back in Device Manager, we can now see the RNDIS/Ethernet Gadget (sorry it is obscured by the right click menu in this screenshot. the PCI Communications devices has nothing to do with the USB device, it's just some un-needed device on my Toshiba laptop that doesn't have a driver associated)
Now we get a long list of device types

And we choose Network Device

There are 2 RNDIS drivers from Microsoft and 2 RNDIS drivers from Microsoft Corporation. Actually the one that works is from Microsoft Corporation (the one that's not highlighted in the screenshot below)

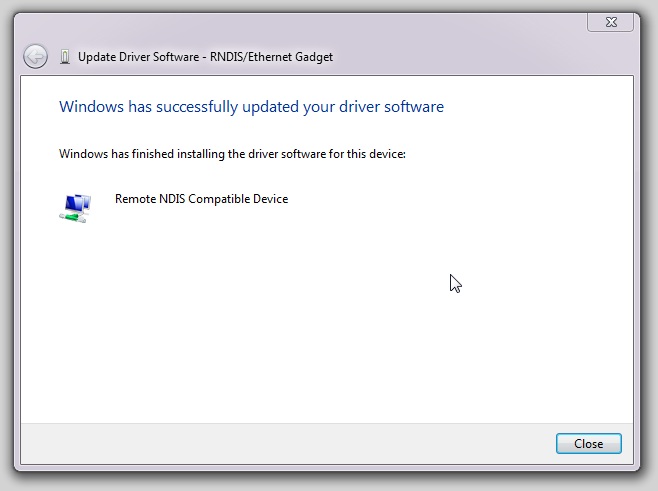
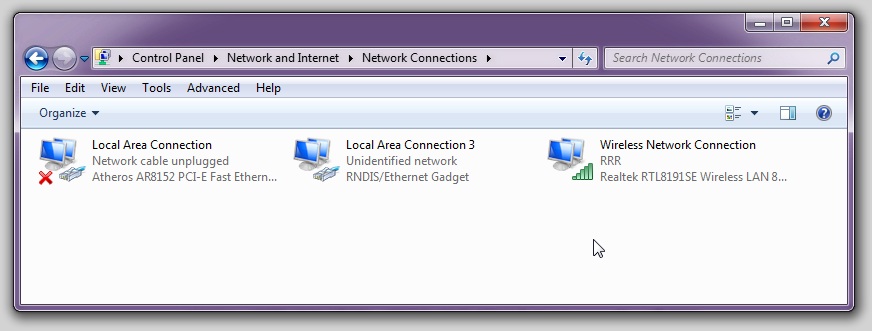
It's done! We have a new network adapter.

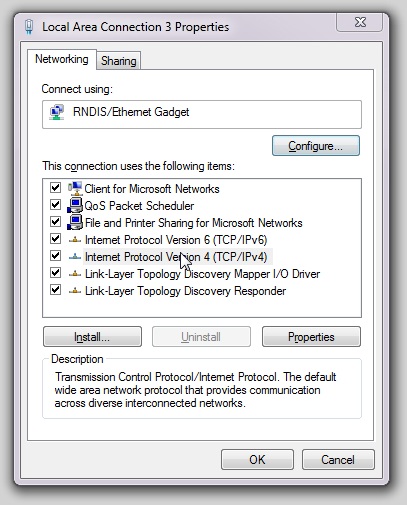
Now lets give this network interface an IP address. Right-click on the new interface and select "Properties".
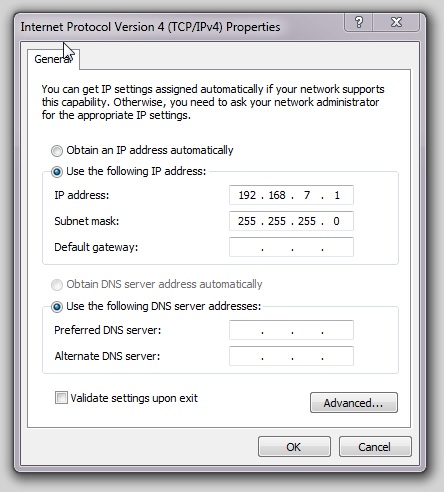
We asked IGEP if the module comes preconfigured with an IP address or it expects to have a DHCP server running on the other end of the USB ethernet interface. The answer was 192.168.7.2.
Double-Click IPV4 and give the Win7 side of the virtual ethernet interface the IP 192.186.7.1 with netmask 255.255.255.0.
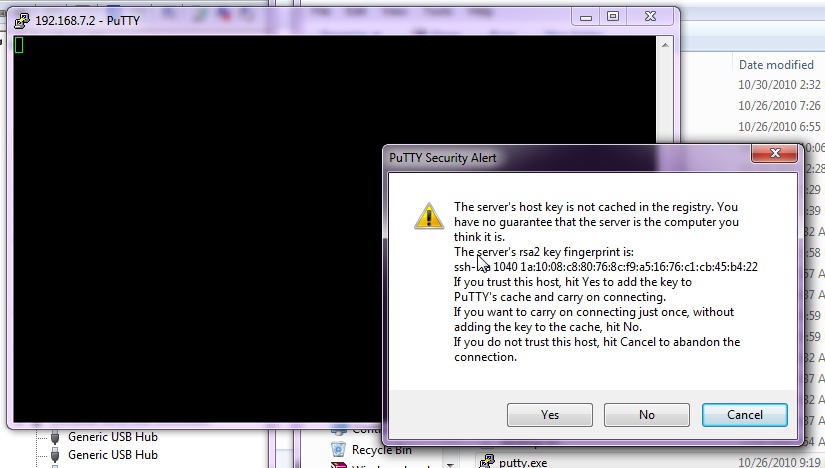
Next step: Install Putty terminal emulator. Then connect to the module's IP address using SSH. User: root, Password: [enter] (no password)
So now that we're in, we need to enable the WiFi and connect to the local WPA network (if your network runs on a different security standard, then read here and google around)
- Code: Select all
root@igep0030:~# cat >> /etc/network/interfaces
allow-hotplug wlan0
auto wlan0
iface wlan0 inet dhcp
        pre-up wpa_supplicant -Dwext -iwlan0 -c/etc/wpa_supplicant.conf -B
        down killall wpa_supplicant

root@igep0030:~# mv  /etc/wpa_supplicant.conf  /etc/wpa_supplicant.conf.orig
root@igep0030:~# cat >  /etc/wpa_supplicant.conf

ctrl_interface=/var/run/wpa_supplicant
ctrl_interface_group=0
eapol_version=1
ap_scan=1
fast_reauth=1

network={
      ssid="add-your-ascii-ssid"
      proto=WPA2                 # try WPA RSN if you WPA2 fails
      key_mgmt=WPA-PSK
      pairwise=CCMP TKIP
      group=CCMP TKIP
      scan_ssid=1
      psk="add-your-ascii-passphrase"
      priority=10
}

root@igep0030:~# ifup -a
If all goes well then you should now have:
- Code: Select all
root@igep0030:~# ifconfig -a
lo        Link encap:Local Loopback
          inet addr:127.0.0.1  Mask:255.0.0.0
          inet6 addr: ::1/128 Scope:Host
          UP LOOPBACK RUNNING  MTU:16436  Metric:1
          RX packets:0 errors:0 dropped:0 overruns:0 frame:0
          TX packets:0 errors:0 dropped:0 overruns:0 carrier:0
          collisions:0 txqueuelen:0
          RX bytes:0 (0.0 B)  TX bytes:0 (0.0 B)

usb0      Link encap:Ethernet  HWaddr 12:81:0D:A9:1F:A3
          inet addr:192.168.7.2  Bcast:192.168.7.255  Mask:255.255.255.0
          inet6 addr: fe80::1081:dff:fea9:1fa3/64 Scope:Link
          UP BROADCAST RUNNING MULTICAST  MTU:1500  Metric:1
          RX packets:551 errors:0 dropped:0 overruns:0 frame:0
          TX packets:280 errors:0 dropped:0 overruns:0 carrier:0
          collisions:0 txqueuelen:1000
          RX bytes:51835 (50.6 KiB)  TX bytes:44729 (43.6 KiB)

wlan0     Link encap:Ethernet  HWaddr 5C:DA:D4:39:7E:25
          inet addr:192.168.1.90  Bcast:192.168.1.255  Mask:255.255.255.0
          inet6 addr: fe80::5eda:d4ff:fe39:7e25/64 Scope:Link
          UP BROADCAST RUNNING MULTICAST  MTU:1500  Metric:1
          RX packets:1074 errors:0 dropped:0 overruns:0 frame:0
          TX packets:105 errors:0 dropped:0 overruns:0 carrier:0
          collisions:0 txqueuelen:1000
          RX bytes:64582 (63.0 KiB)  TX bytes:10876 (10.6 KiB)

root@igep0030:~#
Last edited by limor on Mon Nov 15, 2010 8:38 pm, edited 1 time in total.
