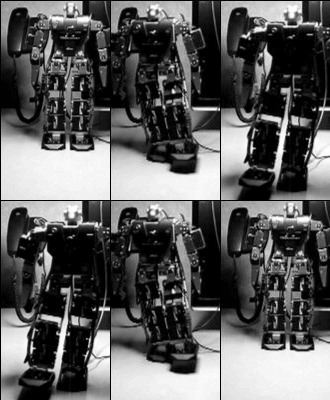
Robonova servo elbow DIY
Robonova servo elbow DIY
Although in reality, this is a video where I had fun with video editing, it also has innovative content.
For example it is been a while that I wanted to test the two servomotors of the elbow that I built years ago, playing with the parts of a servomotor original.
The movement in addition to being smooth enough is also very useful, as the Robonova / Robozak it was almost totally lacking.
http://youtu.be/SytbSchPJRg

First of all, the purpose of the project was to integrate a pair of servo motors with additional function of the elbow on our friend Robonova / Robozak, or as I have renamed NovaXXL because of the many changes I've made.
Just to compare the two models:
ORIGINAL VERSION

NovaXXL VERSION

You may notice two major changes.
the addition hip joint, which perhaps will be the subject of a future analysis and the two elbows, which make the movement of the arm more versatile.

the idea of "reorganize" the servomotor has also come from the fact that if we take a simple servo motor and we add it to the arm, we would get such an effect, that to me, with all due respect to those who did it, but it is a do not really pretty (but it is my point of view):

Another example:

Having said this let's get to the system that I used.
It begins with the disassemble of a pair of servo that I did not use and I removed the logic and mechanics.


After having taken the right size, it moves on to the "reduction" of the polygon entrusted to the valiant "blade" killer:


And thus obtaining a servo motor "in miniskirt"
The gear housing will remain intact for obvious practical reasons:

This mini block, will find place just above the servomotor forearm though rotated 90 °

The bracket has been made in the classic system of aluminum / hammering / fold:


tomorrow for the continuation.
saluti
landyandy
For example it is been a while that I wanted to test the two servomotors of the elbow that I built years ago, playing with the parts of a servomotor original.
The movement in addition to being smooth enough is also very useful, as the Robonova / Robozak it was almost totally lacking.
phpBB [media]
http://youtu.be/SytbSchPJRg

First of all, the purpose of the project was to integrate a pair of servo motors with additional function of the elbow on our friend Robonova / Robozak, or as I have renamed NovaXXL because of the many changes I've made.
Just to compare the two models:
ORIGINAL VERSION

NovaXXL VERSION

You may notice two major changes.
the addition hip joint, which perhaps will be the subject of a future analysis and the two elbows, which make the movement of the arm more versatile.

the idea of "reorganize" the servomotor has also come from the fact that if we take a simple servo motor and we add it to the arm, we would get such an effect, that to me, with all due respect to those who did it, but it is a do not really pretty (but it is my point of view):
Another example:
Having said this let's get to the system that I used.
It begins with the disassemble of a pair of servo that I did not use and I removed the logic and mechanics.


After having taken the right size, it moves on to the "reduction" of the polygon entrusted to the valiant "blade" killer:


And thus obtaining a servo motor "in miniskirt"
The gear housing will remain intact for obvious practical reasons:

This mini block, will find place just above the servomotor forearm though rotated 90 °

The bracket has been made in the classic system of aluminum / hammering / fold:


tomorrow for the continuation.
saluti
landyandy
Re: Robonova servo elbow DIY
Now is the time to clean the motor from pre-existing glue and prepare it for inclusion in a new housing.

......... formed by a square tube, with a side equal to the diameter of the motor.


.....remount the electronics .... and I turn the cables to an alternate location:


.....another small reduction

I go prolong contact between electronics and motor, in order to remove the circuitry from the motor itself.

electronics will be inserted into its original slot.

and .... staying in a slot formed by the bracket:


it's time to insert the motor with the new housing:


a C bracket will be used to secure the two parts together:


End of the experiment.
thanxs for watching
saluti
landyandy

......... formed by a square tube, with a side equal to the diameter of the motor.


.....remount the electronics .... and I turn the cables to an alternate location:


.....another small reduction

I go prolong contact between electronics and motor, in order to remove the circuitry from the motor itself.

electronics will be inserted into its original slot.

and .... staying in a slot formed by the bracket:


it's time to insert the motor with the new housing:


a C bracket will be used to secure the two parts together:


End of the experiment.
thanxs for watching
saluti
landyandy

